20 Mar 2014
outer Shadow 阴影
我们在绘制UI的时候经常需要添加一些阴影效果。 UIKit的CALayer 可以很方便的添加阴影。
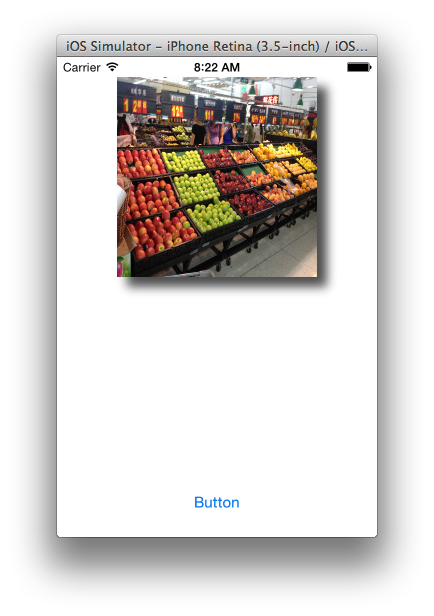
self.imageView.image = [UIImage imageNamed:@"abc.jpg"];
self.imageView.layer.shadowColor = [UIColor blackColor].CGColor;
self.imageView.layer.shadowOpacity = 0.7f;
self.imageView.layer.shadowOffset = CGSizeMake(10.0f, 10.0f);
self.imageView.layer.shadowRadius = 5.0f;
self.imageView.layer.masksToBounds = NO;
UIBezierPath *path = [UIBezierPath bezierPathWithRect:self.imageView.bounds];
self.imageView.layer.shadowPath = path.CGPath;
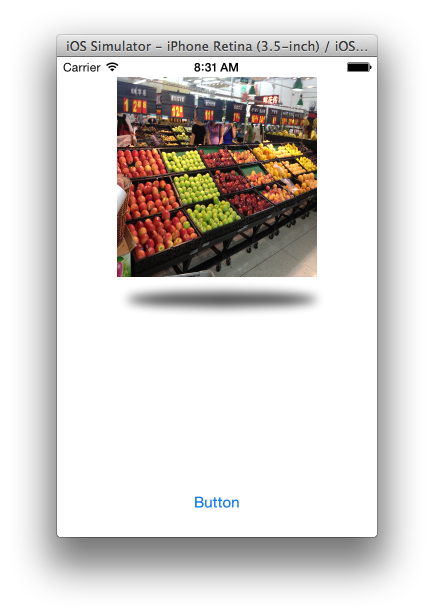
通过 CGPath 我们可以调整阴影的形状,下面就是个椭圆形的阴影。
CGSize size = self.imageView.frame.size;
CGRect ovalRect = CGRectMake(0.0f,size.height + 5,size.width - 10, 15);
UIBezierPath *path = [UIBezierPath bezierPathWithOvalInRect:ovalRect];
self.imageView.layer.shadowPath = path.CGPath;
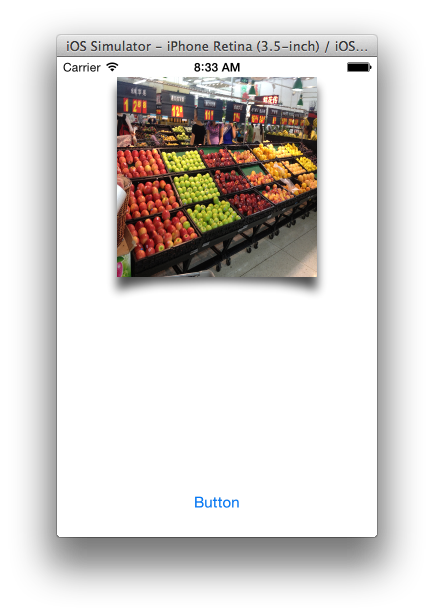
CGSize size = self.imageView.frame.size;
CGFloat curlFactor = 15.0f;
CGFloat shadowDepth = 5.0f;
UIBezierPath *path = [UIBezierPath bezierPath];
[path moveToPoint:CGPointMake(0.0f, 0.0f)];
[path addLineToPoint:CGPointMake(size.width, 0.0f)];
[path addLineToPoint:CGPointMake(size.width, size.height + shadowDepth)];
[path addCurveToPoint:CGPointMake(0.0f, size.height + shadowDepth)
    controlPoint1:CGPointMake(size.width - curlFactor, size.height + shadowDepth - curlFactor)
    controlPoint2:CGPointMake(curlFactor, size.height + shadowDepth - curlFactor)];
self.imageView.layer.shadowPath = path.CGPath;
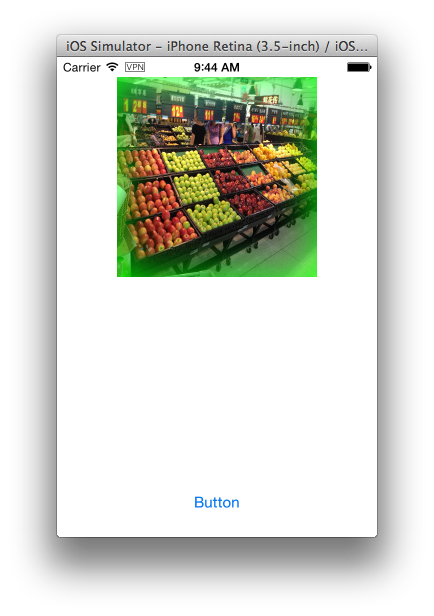
Inner Shadow 内阴影
图形内阴影有些麻烦 我们需要用 Quartz 自己绘制。最简单的方法就是做一张阴影的图片然后加在我们想要阴影效果的 UIView 上。 本着干掉美工的原则我们可以自己来画一个阴影。两种方案 一种就是也是画好生成一张image然后覆盖在想要添加阴影的UIView上。还有一种就是复写-(void)drawRect:方法。实现的方法都是一样的。
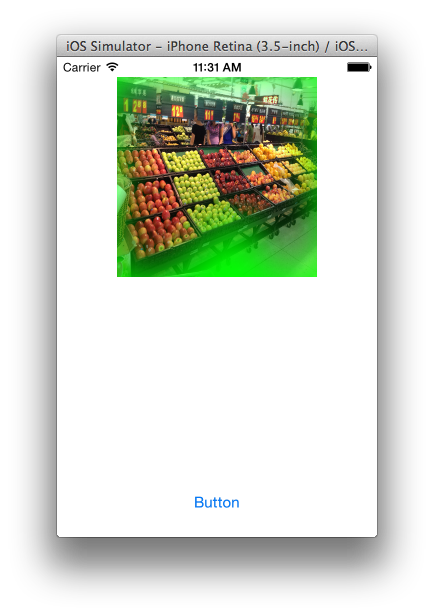
self.imageView.image = [UIImage imageNamed:@"abc.jpg"];
UIGraphicsBeginImageContextWithOptions(self.imageView.frame.size,NO ,[UIScreen mainScreen].scale);
CGContextRef context = UIGraphicsGetCurrentContext();

UIColor* shadow = [UIColor greenColor];
CGFloat shadowBlurRadius = 45;

UIBezierPath* rectanglePath = [UIBezierPath bezierPathWithRect:CGRectMake(0, 0, self.imageView.frame.size.width, self.imageView.frame.size.height)];
[[UIColor clearColor] setFill];
[rectanglePath fill];
CGRect rectangleBorderRect = CGRectInset([rectanglePath bounds], -shadowBlurRadius, -shadowBlurRadius);
rectangleBorderRect = CGRectInset(CGRectUnion(rectangleBorderRect, [rectanglePath bounds]), -1, -1);

UIBezierPath* rectangleNegativePath = [UIBezierPath bezierPathWithRect: rectangleBorderRect];
[rectangleNegativePath appendPath: rectanglePath];
rectangleNegativePath.usesEvenOddFillRule = YES;
CGContextSaveGState(context);

CGFloat xOffset = round(rectangleBorderRect.size.width);
CGContextSetShadowWithColor(context,
                        CGSizeMake(xOffset + copysign(0.1, xOffset),  copysign(0.1, 0)),
                        shadowBlurRadius,
                        shadow.CGColor);
[rectanglePath addClip];
CGAffineTransform transform = CGAffineTransformMakeTranslation(-round(rectangleBorderRect.size.width), 0);
[rectangleNegativePath applyTransform: transform];
[[UIColor grayColor] setFill];
[rectangleNegativePath fill];

CGContextRestoreGState(context);

[[UIColor clearColor] setStroke];
rectanglePath.lineWidth = 1;
[rectanglePath stroke];
UIImage *shadowImage = UIGraphicsGetImageFromCurrentImageContext();
UIGraphicsEndImageContext();

CALayer *shadowLayer = [CALayer layer];
shadowLayer.frame = CGRectMake(0, 0, self.imageView.frame.size.width,   self.imageView.frame.size.height);
shadowLayer.contents = (__bridge id)(shadowImage.CGImage);
[self.imageView.layer addSublayer:shadowLayer];
Inner Shadow With CGPath
在这里我用了绿色的阴影,因为图片整体偏暗 用黑色的不明显。
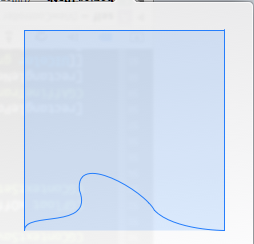
同样的我们通过更改 rectanglePath 就可以画出很多有趣的不规则的内阴影。我将上的rectanglePath画的矩形变成下面这个不规则图形。我们就得到了一个底部是波浪形状的阴影。
UIBezierPath* rectanglePath = [UIBezierPath bezierPath];
UIBezierPath* bezier2Path = [UIBezierPath bezierPath];
[bezier2Path moveToPoint: CGPointMake(0, 200)];
[bezier2Path addCurveToPoint: CGPointMake(0, 0) controlPoint1: CGPointMake(0, -15) controlPoint2: CGPointMake(0, -2)];
[bezier2Path addLineToPoint: CGPointMake(200, 0)];
[bezier2Path addLineToPoint: CGPointMake(200, 200)];
[rectanglePath appendPath:bezier2Path];

UIBezierPath* bezier3Path = [UIBezierPath bezierPath];
[bezier3Path moveToPoint: CGPointMake(0, 200)];
[bezier3Path addCurveToPoint: CGPointMake(70, 180) controlPoint1: CGPointMake(0, 200) controlPoint2: CGPointMake(50, 200)];
[bezier3Path addCurveToPoint: CGPointMake(145, 160) controlPoint1: CGPointMake(80, 160) controlPoint2: CGPointMake(150, 120)];
[bezier3Path addCurveToPoint: CGPointMake(200, 200) controlPoint1: CGPointMake(130, 200) controlPoint2: CGPointMake(200, 180)];

[rectanglePath appendPath:bezier3Path];
19 Mar 2014
Bitmap Image
位图图像 Bitmap Image 由像素组成,每一个像素都相当于图像中的一个点,JPEG,TIFF,PNG 类型的文件都是位图图像。在位图图像中每个像素都被分配一个特定位置和颜色值。在处理位图图像时,我们编辑的是像素而不是对象或形状,也就是说,编辑的是每一个点。位图图像被限制成正方形,但是我们通过填充透明像素来使图片呈现其他的形状包括旋转裁切等效果。
Quartz 支持很多流行的类型的图片格式,在iOS上包括 JPEG, GIF, PNG, TIF, ICO, GMP, XBM, and CUR。其他的图片类型 我们可以通过将格式信息传递给Quartz保证图片被正确的解析。
通常情况下我们在程序中大多使用 UIImagePNGRepresentation() 来将图片转换成二进制数据。但是这样的话实际上在转换的过程中被压缩了。那么我们可以通过 Quartz 来获得原始的图片数据。
首先我们要先把图片绘制到context上 然后使用 CGBitmapContextGetData()获取二进制数据。
 1 -(NSData *)bytesFromRGBImage:(UIImage *)sourceImage {
 2  if (!sourceImage) {
 3      return nil;
 4  }
 5
 6  CGColorSpaceRef colorSpace = CGColorSpaceCreateDeviceRGB();//创建设备的colorSpace
 7
 8  if (colorSpace == NULL) {
 9      return nil;
10  }
11
12  int width = sourceImage.size.width;//获取的像素点的个数
13  int height = sourceImage.size.height;//获取的像素点的个数
14  //8 是每一像素点的大小 8个bit(0-255)的空间
15  // width * 4 每一行的像素点占用的字节数,每个像素点的ARGB四个通道各占8个bit(0-255)的空间
16
17  CGContextRef context = CGBitmapContextCreate(NULL,width, height, 8, width *4, colorSpace, (CGBitmapInfo)kCGImageAlphaPremultipliedFirst);
18
19  CGColorSpaceRelease(colorSpace);
20  if (context == NULL) {
21      return nil;
22  }
23
24  CGRect rect = (CGRect){.size = sourceImage.size};
25  CGContextDrawImage(context, rect, sourceImage.CGImage);
26  NSData *data = [NSData dataWithBytes:CGBitmapContextGetData(context) length:width*height*4];
27  CGContextRelease(context);
28  return data;
29 }
同样我们还可以通过二进制数据获得图片对象
 1 -(UIImage *)imageFromBytes:(NSData *)data size:(CGSize)targetSize {
 2  int width = targetSize.width;
 3  int height = targetSize.height;
 4  if (data.length < width *height *4) {
 5      return nil;
 6  }
 7
 8  CGColorSpaceRef colorSpace = CGColorSpaceCreateDeviceRGB();
 9  if (colorSpace == NULL) {
10      return nil;
11  }
12  Byte *bytes = (Byte *)data.bytes;
13  CGContextRef context = CGBitmapContextCreate(bytes, width, height, 8, width*4, colorSpace, (CGBitmapInfo) kCGImageAlphaPremultipliedFirst);
14  CGColorSpaceRelease(colorSpace);
15  if (context == NULL) {
16      return nil;
17  }
18
19  CGImageRef imageRef = CGBitmapContextCreateImage(context);
20  UIImage *image = [UIImage imageWithCGImage:imageRef];
21  CGContextRelease(context);
22  return image;
23 }
Alpha通道
Alpha通道增加像素的透明度信息。
色彩深度
色彩深度又叫色彩位数,即位图中要用多少个二进制位来表示每个点的颜色,是分辨率的一个重要指标。常用有1位(单色),2位(4色,CGA),4位(16色,VGA),8位(256色),16位(增强色),24位和32位(真彩色)等。色深16位以上的位图还可以根据其中分别表示RGB三原色或CMYK四原色(有的还包括Alpha通道)的位数进一步分类.
图像遮罩(image mask)
image mask 也是由一組像素组成的特殊的位图,能指定图片的绘制区域,常见就通过image mask来绘制各种各样的形状,在iOS实际开发中用到的最多的可能就是圆角矩形了。 说白了就是就是我们通过image mask想让图片怎么显示,就怎么显示。
18 Mar 2014
Blend Modes
我们在使用Quartz 2D画图的时候,经常遇到图形叠加的情况。在多个图形重叠的时候有时候我们想重叠的部分透明阿,或者重叠的部分颜色混合在一起阿。这时候就要用到 Quartz 2D 的混合模式了
Blend Modes。通过 Blend Modes 我们可以把几个图片组合起来绘制到已经有图形的
graphic context上。
How to use Blend Modes
- 首先先画背景。
- 使用 CGContextSetBlendMode 设置 Blend Modes
- 在画我们想和背景图形合成的图片 用 CGContextDrawImage 绘制。其实不只是图片。接下来绘制的无论是图片 矩形 文字都会使用 Blend Modes 和背景组合在一起。
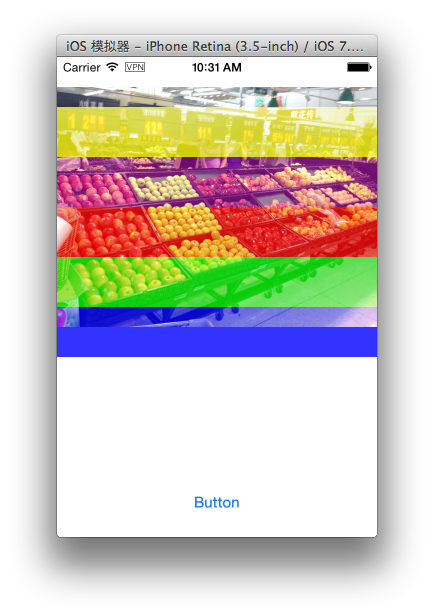
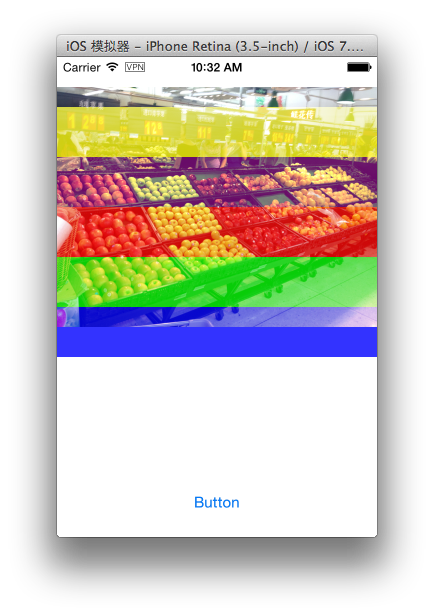
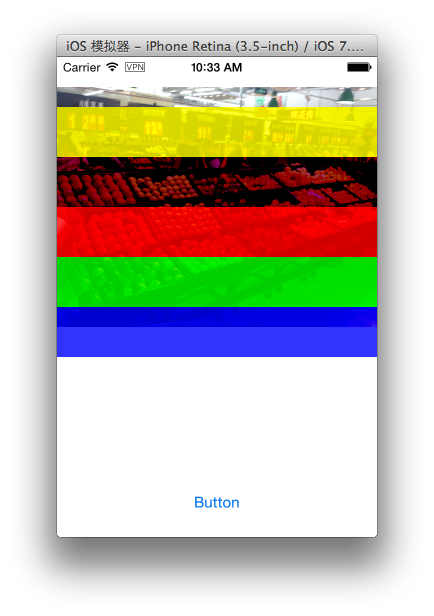
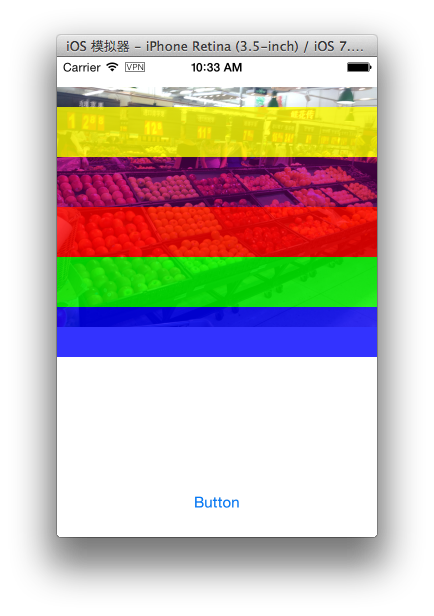
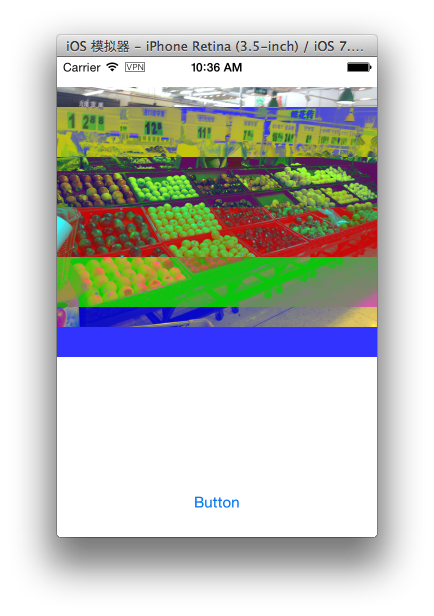
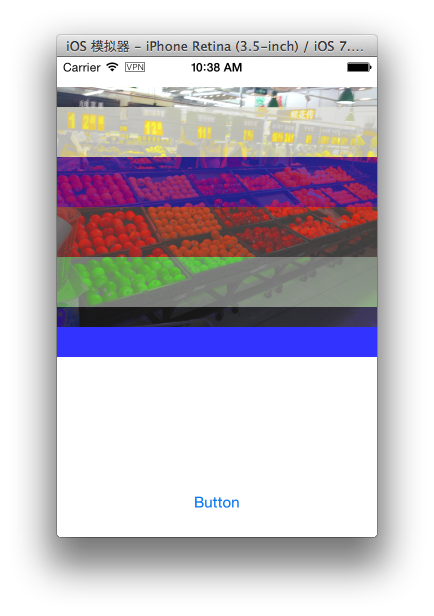
下面我们把左边的图片跟右边的条纹背景用不同的 Blend Modes 混合在一起看看都有什么效果
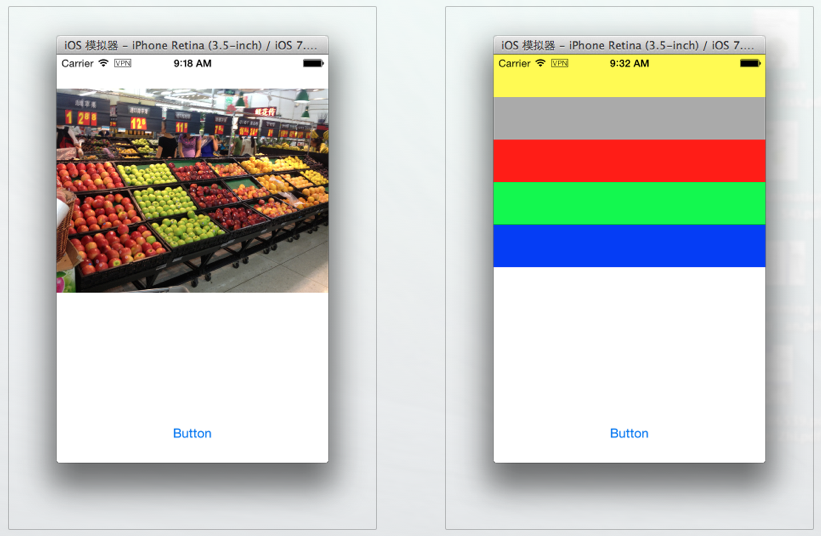
Normal Blend Mode
UIImage *foregroundImage = [UIImage imageNamed:@"abc.jpg"];
UIGraphicsBeginImageContextWithOptions(CGSizeMake(320, 320),NO ,[UIScreen mainScreen].scale);
CGContextRef context = UIGraphicsGetCurrentContext();
CGFloat y = 0;
CGFloat height = 50 ;
for (int i = 0; i<5; i++) {
    y  += height ;
    CGRect rect = CGRectMake(0, y, 320, height);
    UIColor *color = [self colorWihtIndex:i];
    CGContextSetFillColorWithColor(context, color.CGColor);
    CGContextFillRect(context, rect);
    CGContextSaveGState(context);
}

CGContextScaleCTM(context, 1.0f, -1.0f);
CGContextTranslateCTM(context, 0.0f, -320);

CGContextSetBlendMode(context, kCGBlendModeNormal);
CGContextDrawImage(context, CGRectMake(0, 50, 320, 240), foregroundImage.CGImage);
UIImage *image = UIGraphicsGetImageFromCurrentImageContext();
self.imageView.image = image;
UIGraphicsEndImageContext();


-(UIColor *)colorWihtIndex:(NSInteger) index{
    if (index == 0)
        return [[UIColor yellowColor] colorWithAlphaComponent:0.8];
    else if (index== 1)
        return [[UIColor purpleColor] colorWithAlphaComponent:0.8];
    else if (index== 2)
        return [[UIColor redColor]colorWithAlphaComponent:0.8];
    else if (index== 3)
        return [[UIColor greenColor] colorWithAlphaComponent:0.8];
    else if (index== 4)
        return [[UIColor blueColor] colorWithAlphaComponent:0.8];
    return [UIColor purpleColor];
}

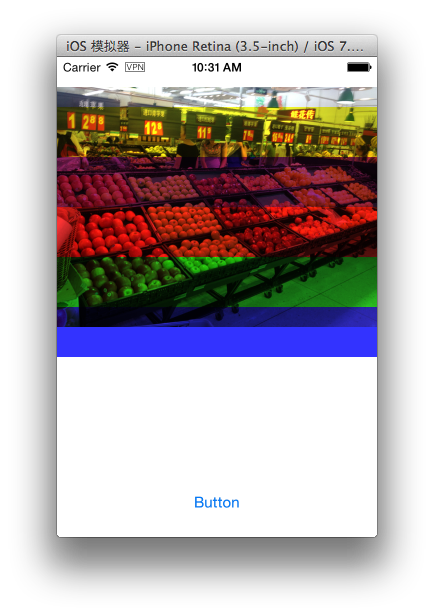
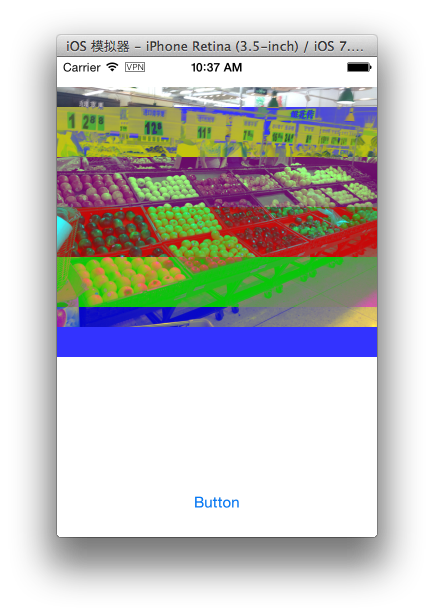
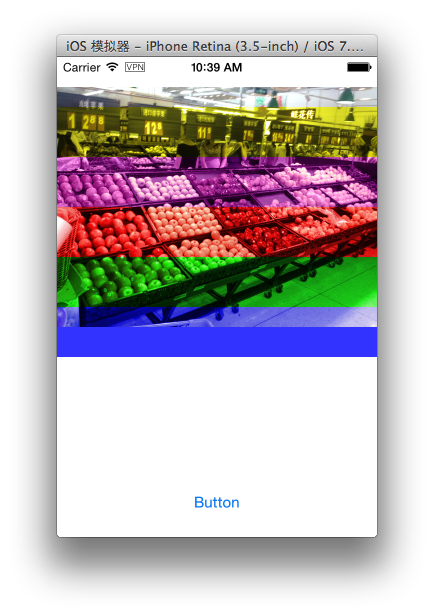
Multiply Blend Mode
CGContextSetBlendMode(context, kCGBlendModeMultiply);
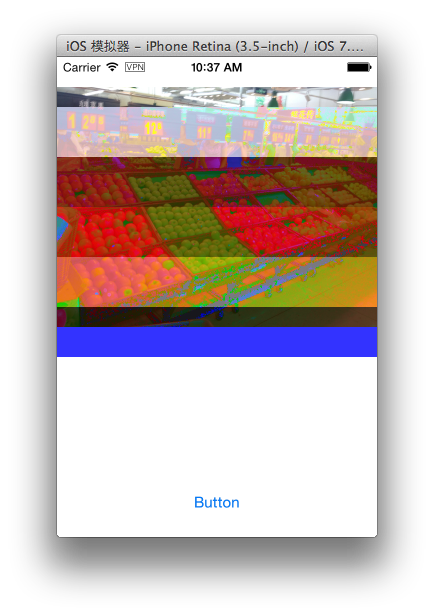
Screen Blend Mode
CGContextSetBlendMode(context, kCGBlendModeScreen);
Overlay Blend Mode
CGContextSetBlendMode(context, kCGBlendModeOverlay);

Lighten Blend Mode
CGContextSetBlendMode(context, kCGBlendModeLighten);
Color Dodge Blend Mode
CGContextSetBlendMode(context, kCGBlendModeColorDodge);
Color Burn Blend Mode
CGContextSetBlendMode(context, kCGBlendModeColorBurn);
Soft Light Blend Mode
CGContextSetBlendMode(context, kCGBlendModeSoftLight);
Hard Light Blend Mode
CGContextSetBlendMode(context, kCGBlendModeHardLight);
Difference Blend Mode
CGContextSetBlendMode(context, kCGBlendModeDifference);
Exclusion Blend Mode
CGContextSetBlendMode(context, kCGBlendModeExclusion);
Hue Blend Mode
CGContextSetBlendMode(context, kCGBlendModeHue);
Saturation Blend Mode
CGContextSetBlendMode(context, kCGBlendModeSaturation);
Color Blend Mode
CGContextSetBlendMode(context, kCGBlendModeColor);

Luminosity Blend Mode
CGContextSetBlendMode(context, kCGBlendModeLuminosity);
17 Mar 2014
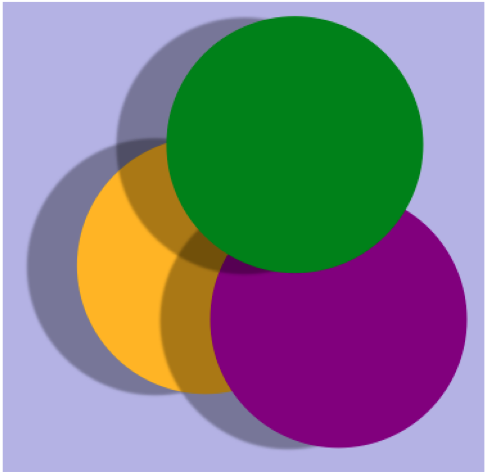
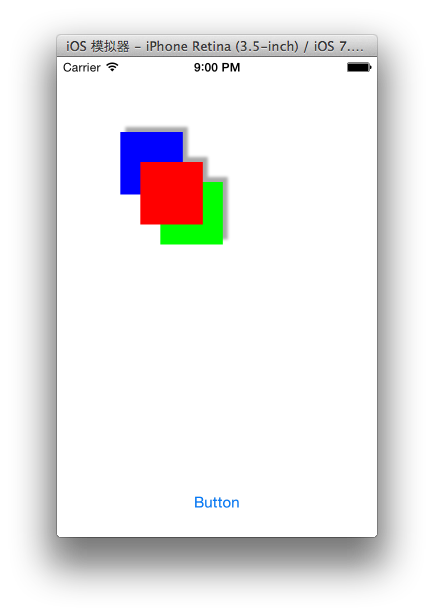
Transparency Layer 是由多个对象组合在一起拼成的图形,它在图形绘制的过程中会被当作一个对象来处理。 Transparency Layer 最常见的用处就是在我们想对一组图形添加效果的时候。比如像下面这样对三个叠加在一起的三个圆形添加阴影。
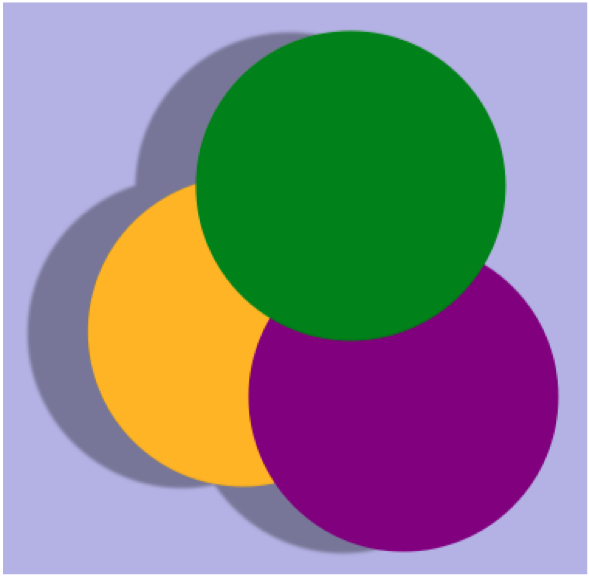
如果我们添加阴影的时候没用把这三个圆形绘制在 Transparency Layer 上的话 那么阴影则将会添加在每个圆形周围上。
使用 Transparency Layer 的时候,我们首先要在绘制 Transparency Layer 开始的地方调用
CGContextBeginTransparencyLayer 它需要两个参数,一个就是我们绘制图形的graphics context 另外一个是个CFDictionary对象,通过第二个参数我们可以控制一些绘制图形的属性,比如 阴影的开关 图形混合的类型 和图形的alpha值。一般的情况下都是传NULL。接下来我们就可以执行我们绘图的代码了。 画完之后在 UIGraphicsEndImageContext 或者 UIGraphicsPopContext 之前我们需要调用 CGContextEndTransparencyLayer来结束 Transparency Layer的绘制。此外,我们还可以使用 CGContextBeginTransparencyLayerWithRect 来制定区域来绘制 Transparency Layer
我们看下面这个例子代码
UIGraphicsBeginImageContextWithOptions(CGSizeMake(320, 320),NO ,[UIScreen mainScreen].scale);
CGContextRef myContext = UIGraphicsGetCurrentContext();
CGFloat wd = 250;
CGFloat ht = 250;
CGSize myShadowOffset = CGSizeMake (5, -5);
CGContextSetShadow (myContext, myShadowOffset, 3);
CGContextBeginTransparencyLayer (myContext, NULL);
CGContextSetRGBFillColor (myContext, 0, 1, 0, 1);
CGContextFillRect (myContext, CGRectMake (wd/3+ 20,ht/2 ,wd/4,ht/4));
CGContextSetRGBFillColor (myContext, 0, 0, 1, 1);
CGContextFillRect (myContext, CGRectMake (wd/3-20,ht/2-50,wd/4,ht/4));
CGContextSetRGBFillColor (myContext, 1, 0, 0, 1);
CGContextFillRect (myContext, CGRectMake (wd/3,ht/2-20,wd/4,ht/4));
CGContextEndTransparencyLayer (myContext);
UIImage *image = UIGraphicsGetImageFromCurrentImageContext();
self.imageView.image = image;
UIGraphicsEndImageContext();
三个矩形被当作一个整体添加了阴影,如果注释掉
CGContextBeginTransparencyLayer (myContext, NULL);
和
CGContextEndTransparencyLayer (myContext);
那么阴影就会单独的添加在每个图形上。

16 Mar 2014
Coordinate Systems
Quartz 2D和UIKit的坐标系是不同的,Quartz 2D 使用的是笛卡尔坐标系 原点在左下角,
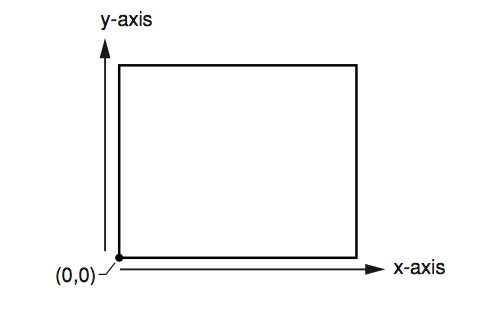
UIkit坐标系的原点在左上角。

这个也就可以理解为什么用Quartz 2D画的图形和UIKit的倒过来的。
但是在IOS 3.2及后续的版本中,当UIKit为你的应用程序创建一个Graphics Context时,也对Context进行了额外的修改以匹配UIKit的约定。
What is CTM ?
CTM = Current Transformation Matrix
Quartz通过使用当前转换矩阵(current transformation matrix, CTM)将一个独立的坐标系统(user space)映射到输出设备的坐标系统(device space),CTM 通过平移(translation)、旋转(rotation)、缩放(scale)操作将点从一个坐标空间映射到另外一个坐标空间。
我们可以通过CTM来决定对象如何被绘制。例如,为了绘制一个旋转了45度的矩形,我们可以在绘制矩形之前旋转Graphics Context的坐标系统。Quartz使用旋转过的坐标系统来将矩形绘制到输出设备中。设备显示在屏幕上的矩形,就是旋转过后的矩形。
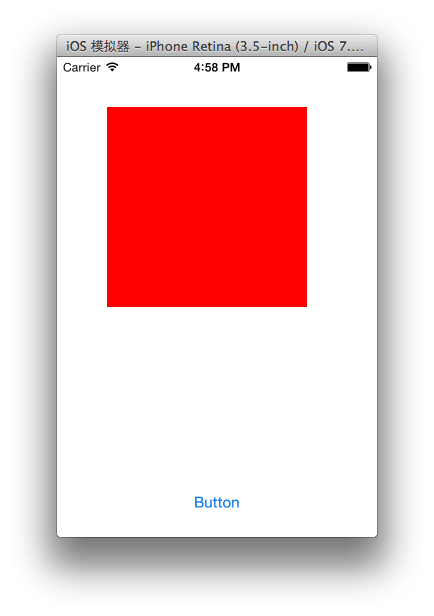
我们先来看一个图片绘制的例子,首先是是没做矩阵转换的代码。
UIGraphicsBeginImageContextWithOptions(CGSizeMake(320, 320),NO ,[UIScreen mainScreen].scale);
// Perform drawing here
UIBezierPath *path = [UIBezierPath bezierPathWithRect:CGRectMake(50, 50, 200, 200)];
[[UIColor redColor] setFill];
[path fill];
UIImage *image = UIGraphicsGetImageFromCurrentImageContext();
self.imageView.image = image;
UIGraphicsEndImageContext();
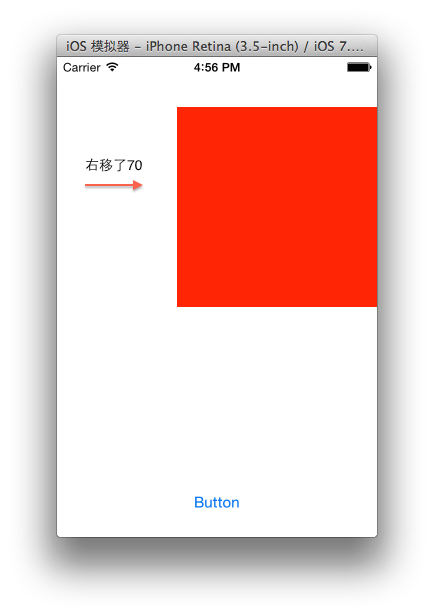
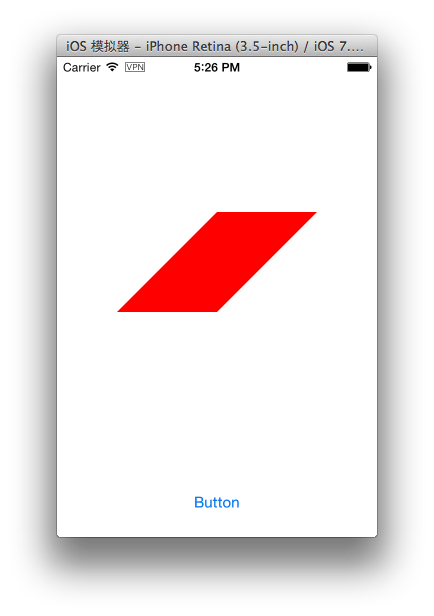
CGContextTranslateCTM
UIGraphicsBeginImageContextWithOptions(CGSizeMake(320, 320),NO ,[UIScreen mainScreen].scale);
// Perform drawing here
CGContextRef context = UIGraphicsGetCurrentContext();
CGContextTranslateCTM(context, 70, 0);
UIBezierPath *path = [UIBezierPath bezierPathWithRect:CGRectMake(50, 50, 200, 200)];
[[UIColor redColor] setFill];
[path fill];
UIImage *image = UIGraphicsGetImageFromCurrentImageContext();
self.imageView.image = image;
UIGraphicsEndImageContext();
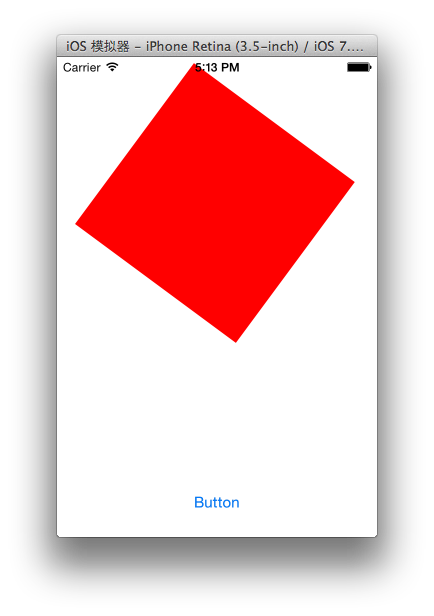
CGContextScaleCTM
CGContextScaleCTM(context, 0.5, 1.5);
CGContextRotateCTM
CGContextRotateCTM(context, M_2_PI);
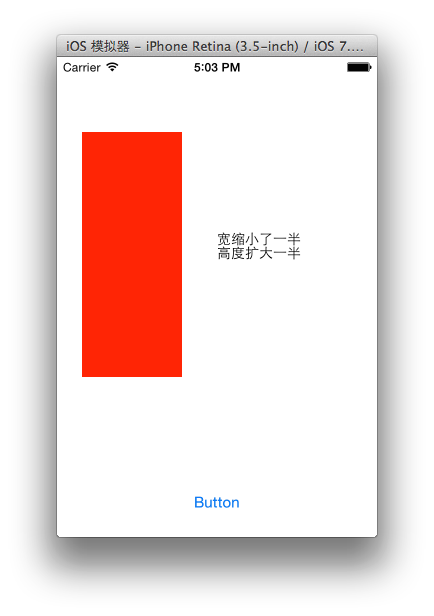
这时候我们发现旋转并没有按照绘制的Context中心旋转, 因为旋转是以坐标系的原点为中心来做的,所以我们为了要保持图片的中心位置就要配合 CGContextTranslateCTM 一起使用。
CGContextTranslateCTM(context,self.imageView.center.x,self.imageView.center.y);
CGContextRotateCTM(context, M_2_PI);
CGContextTranslateCTM(context, -self.imageView.center.x, -self.imageView.center.y);
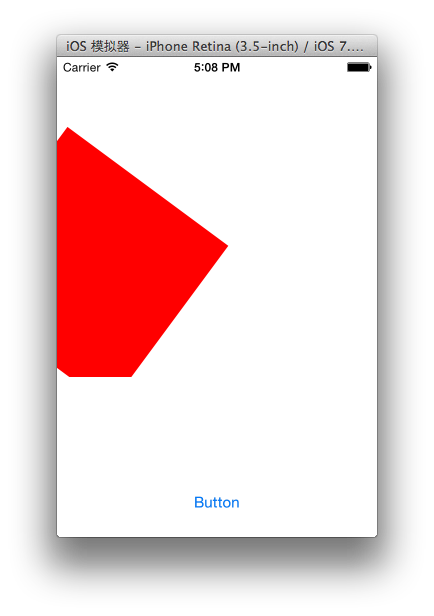
CGContextConcatCTM
此外我们还可以通过 *CGAffineTransform *来变幻坐标系 比如我之前写过的仿射变换。
CGContextTranslateCTM(context,self.imageView.center.x,self.imageView.center.y);
CGAffineTransform transform = CGAffineTransformIdentity;
transform = CGAffineTransformScale(transform, 0.5, 0.5);
transform = CGAffineTransformTranslate(transform, 0, 100);
transform.c = -0.5;
transform.b = 0;
CGContextConcatCTM(context, transform);
CGContextTranslateCTM(context, -self.imageView.center.x, -self.imageView.center.y);
CGContextGetCTM
我们可以通过 CGContextGetCTM 在程序运行中取回当前Context上使用的转换矩阵。